

The cockpit from the port side.

The main salon.


The wheels are off and the bearings being repacked.


The cockpit from astern.


The wheels are off and the bearings being repacked.


Here she is coming up the driveway.

Here we are unloading.

Here she is after the pressure wash. Most of the really bad dirt and mold
came off but she needs to be scrubbed really well before she'll shine again.


And there she sits, home at last.

There it is without the trailer.


The trailer stripped down and painted black.


Here you can see how rusty the top of the keel is after 20 years of just sitting.
This pulley arrangement needs to be changed. Notice the copper grounding wire for lightning protection.

Here is the new setup. Stainless steel buffs up nice doesn't it?
Notice the two pulleys above closer together and the single pulley on the keel.
I still want to add in a safety cable which I'll attach using the holes at the front.

Here is the fixed up trailer. The rungs were added to be able to climb up onto the boat
without getting my feet wet.

Notice here that the top rung got cut off again. It was too high and would have banged
against the hull.

A look at the front end blocked up

Another look at the front.

I need another six inches to get the keel out so..... rather than lift, I dug down.

It would have come out if only the the cable were long enough. You can also see that the keel needs some serious fairing.

Well, the centre board is out. I had to take the pulleys off the top and then lower the board out with my jacks.
A slow process but it worked. Here you can see the rust above where they painted the anti-fouling paint.

Here you can see the other side of the centre board. It was actually really easy to move around with the dolly.
Nice too that it just stood there for me.

Here she is back on her trailer.
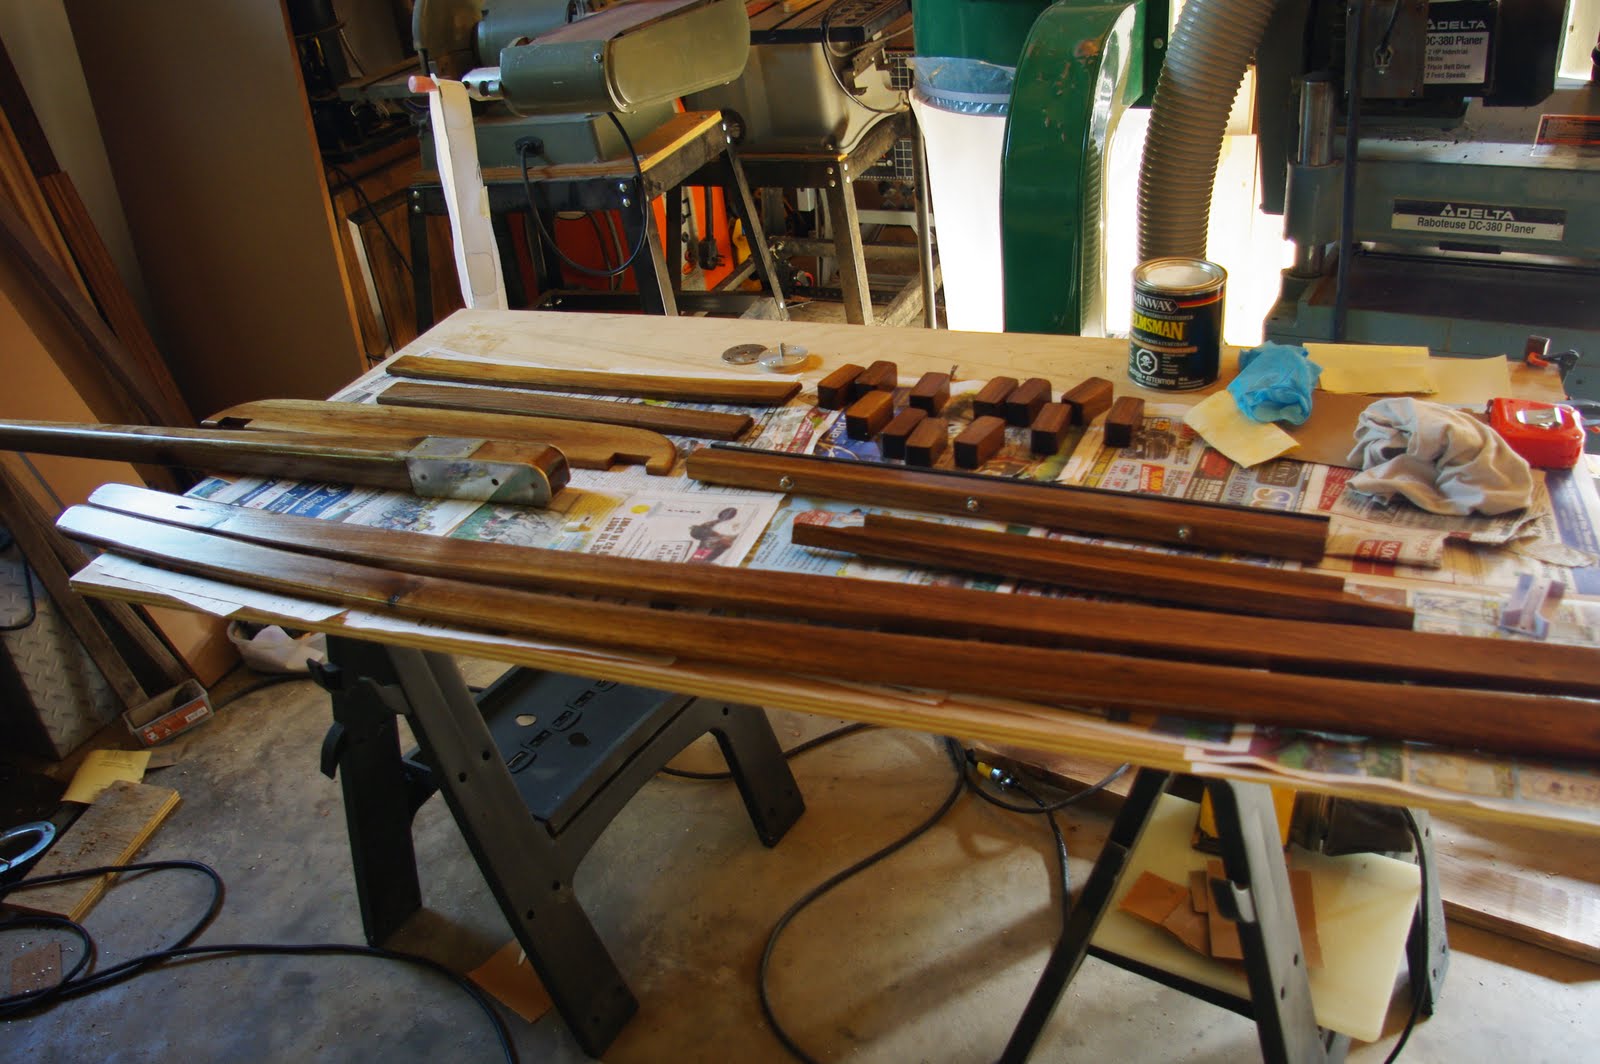
Here are the bits urethaned and ready to go on the boat.


Here is the modified masthead which now has aluminum pulleys, two extra sets of pulleys, and an anchor light.The bolt ends still need to be cut off and the wiring will be routed down the mast with the antenna wire.